Tuesday, March 15, 2011

Modelling motivations

So, why do we railway modellers model railways? As with most things, the rationale depends on a range of factors which lead to a variety of outcomes.

In my case, I get the greatest satisfaction from construction and from operation. Whilst I am highly appreciative of scrupulously fabricated scale models, I am more interested in something which is representational - something which will do the job and looks more or less OK. 


 As my fictional railway is set in a real location in the Cheshire countryside, I want the stock and buildings to be reminiscent of what might be found on a three foot narrow gauge railway at the start of the 1930s. My locos are inspired by those which were constructed and run in the British Isles. 


 As my modelling skills are basic, and my tolerance for inaccuracy is quite high; I am more than happy to use a commerical chassis and construct a model which resembles the original. This enables me to use the limited time I have available for modelling to produce sufficient stock for my representation of a complete narrow gauge railway system. Maybe, once I have produced all the rolling stock needed, I will start replacing some of the less convincing models with more detailed alternatives but in the meantime, I will happily run closed vans which were adapted from LGB models, open wagons from my own resin castings attached to inappropriate Hartland chassis, and coaches which are based loosely on Pickering originals.


When it comes to operation, I am very keen to run services on my railway which would not be out of place on a narrow gauge railway of the era. The timetable for passenger services is a direct copy of one written in 1923 for the Southwold Railway - a 3 foot narrow gauge railway with the same number of stations and of about the same length as my railway. 


 Freight is handled by one dedicated pick-up goods per day, plus at least one mixed train. This is based on the services ran on the two foot six inch gauge Welshpool and Llanfair around 1915, though all passenger trains on the W&L were billed as mixed. To make life more interesting, I assume it is a summer's market day every time I run the railway. I suppose I could try running a round the year service with seasonal timetables and freight movements to match - however, as I have very little spare time to run the railway and so, for now, I am more than happy to keep re-running the same day's services, albeit with ongoing freight movements dictated by the computer program.

As realistic operation is something of great interest to me, freight movements are generated by a computer program which I wrote myself, using a relational database called 4th Dimension (or 4D) - for more detail see Progress Report 16. 


 I have tried to anticipate the sorts of freight which the railway would have carried in reality, had it been built. Cheshire Cheese was produced in the locality, as was soft fruit.

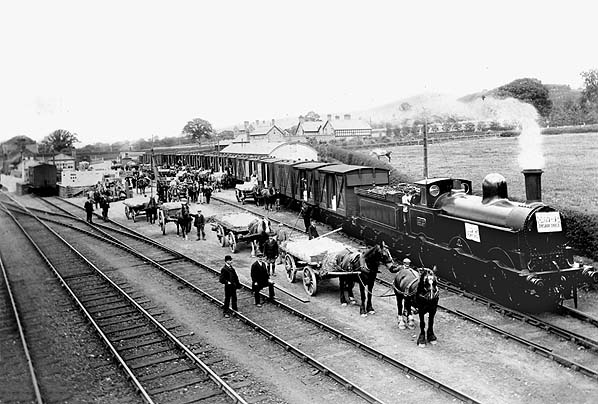
 The cheese train at Broxton Station (c1910)

As the line serves a rural community, these is regular livestock traffic and the transportation of agricultural machinery, feed and seed. There is also regular traffic in household goods and grocery for the local community which in my history includes hotels serving visitors taking the local spa waters or visiting the landmarks such as Beeston Castle


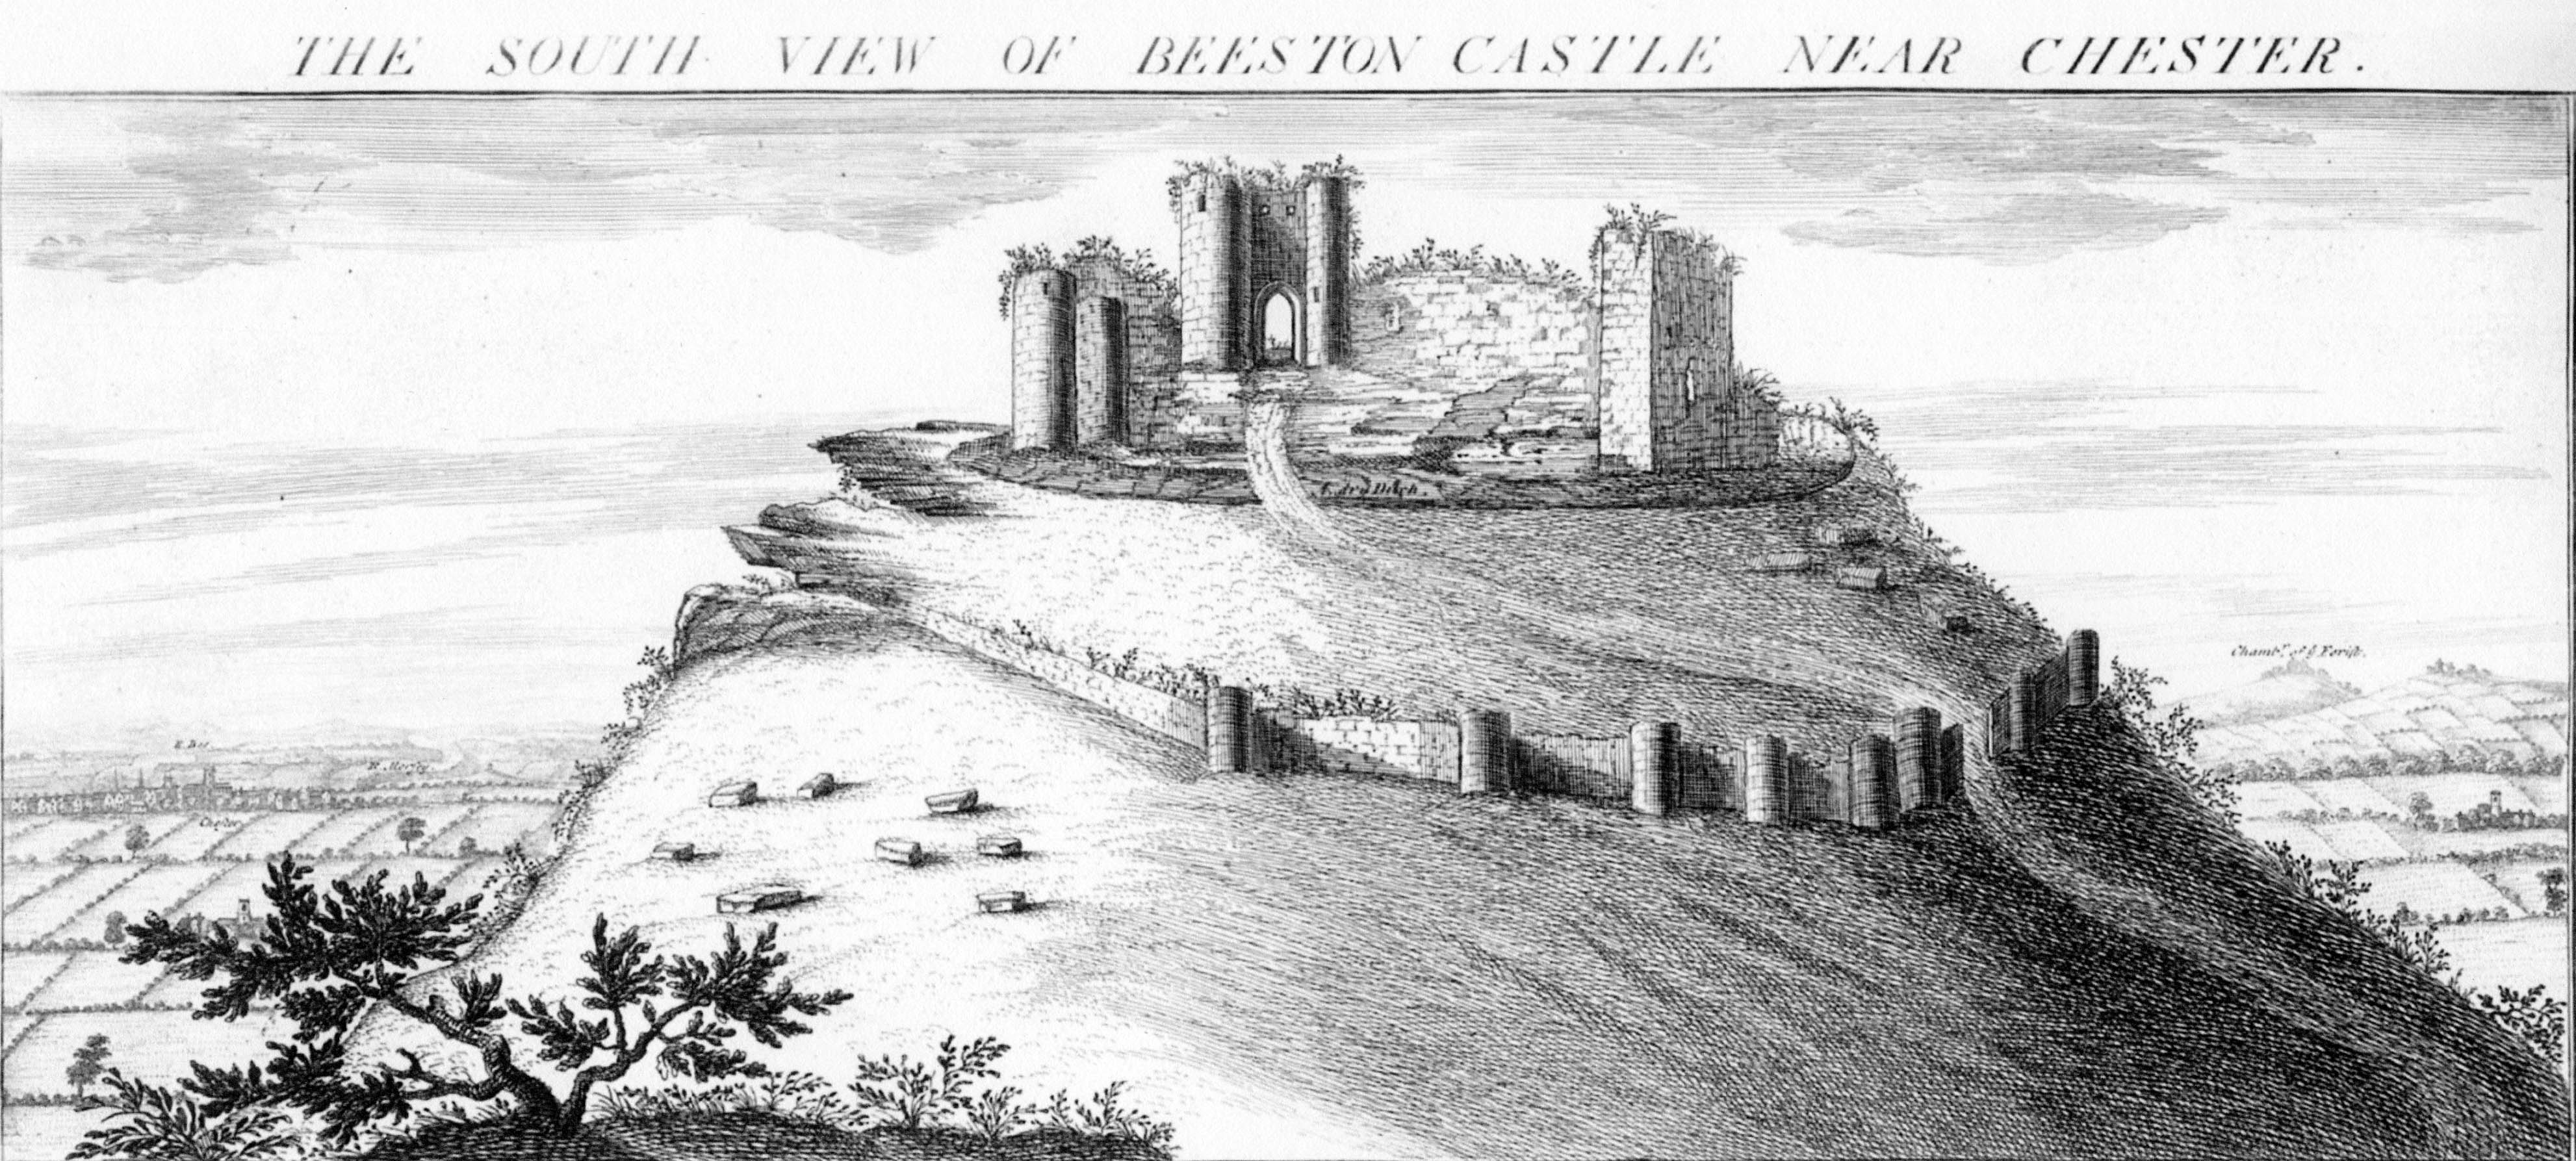
In line with the majority of railways in this era, coal is a mainstay of goods services. In addition, the railway serves two local 'industries' - copper mines and a timber yard. In reality, the copper mines in the Peckforton Hills were never highly productive, though one geological survey in the early 1900s predicted they could become the most bountiful in the UK. Three (sometimes four) trains of ore wagons travel the line each day, transporting crushed ore and spoil from the mines to the mainline interchange sidings at Beeston Market Station. In my scenario, the ore is transported to a treatment plant at the company's sister mines at Alderley Edge whilst the spoil is taken along the coast for a land reclamation project (all quite convenient!).

All railway buildings have been (and will be) constructed from timber, grown locally as part of the Peckforton Estate's forestry enterprise and any other buildings reflect those in the locality being constructed from the local red sandstone. 


 One day, I will develop a signalling system. With the copper mine trains and the goods train running concurrently with the passenger services, I cannot operate with 'one loco in steam'. I'm assuming the Board of Trade would insist that the density of traffic merits an interlocked signalling system - but this is something yet to be fully researched.

So, modelling the Peckforton Railway has provided an opportunity for me to create a representation of an imagined reality - with the emphasis on 'representation'. I am happy to tolerate inaccuracies in the appearance of the models, provided they are broadly appropriate for the context.


In order to create the railway I have had to carry out historical research into the building and operation of similar railways and into the history of the locality for the line. I have surveyed the actual route to ensure the railway is feasible and investigated the copper mining process. I have developed skills in landscaping, gardening, brick laying, casting in concrete, stone masonry and joinery. I am now reasonably proficient in electrical wiring (both low voltage and mains), metal working and modelling in plastic, resin casting, woodwork and timber. 

I have developed an understanding of basic mechanics and the properties of materials and joining techniques. I am getting to grips with spray painting, brush painting, lining, weathering and and distressing (the models, not me personally - well not much!). I'm also beginning to investigate fashions of the early 1930s, to ensure the little people which will populate the railway will not look out of place.


I'm not aware of any other hobby which combines so many skills and multifarious competences. It certainly keeps me occupied, and out of mischief. One day, the railway will be finished, but in the meantime, each year that passes sees yet more developments and innovations.

Monday, March 07, 2011

Progress Report 34

Despite semi-retirement, I seem to have had less time to indulge in modelling than when I was working full time. Maybe when I come to the end of the list of household jobs which have been accumulated over the past 30 years, I'll have a little more time for the railway.

More figures
Since my last Progress Report (see Progress Report 33), I've slowly been accumulating more figures to populate the railway, courtesy of eBay.

One of the difficulties I've found about buying figures from eBay is that 'G Scale' covers a multitude of scales from 1:32 to 1:19. As a consequence, some figures I have bought are grossly under scale whilst others seem to be relative giants. As my model is supposed to represent a 3ft narrow gauge railway, the scale I am working to is 15mm to the foot or 1:20.3, 16mm scale figures (1:19) are therefore slightly over scale.

Locomotives
At long last I have completed the repaint and the lining for the Barclay 2-4-0 (Beeston - No. 2)


and also for loco No. 3 (Bickerton), a Hunslet-inspired 0-4-0 (See How I constructed the Hunslet from a GRS kit)


Both have been finished in the railway's livery of Humbrol Brunswick Green with gold (Trimline) lining (see How I lined my locos with Trimline tape). I am slowly improving my spray painting techniques though it is still something which I approach with a certain amount of trepidation.

Work has started on bashing the ToyTrain diesel into a more prototypical model based on those constructed in the 1920s and 30s by Fowler (see How I bashed a ToyTrain diesel into an early Fowler)


I am presently working on trying to adapt the chassis to add a layshaft and fly cranks. Once I have the chassis sorted I will turn my attention to the body which, I'm hoping, will be less complicated and traumatic than hacking the chassis about.

Coaching stock
I am also in the process of making two Andel coach kits of Ashover Railway coaches (see How I constructed two Ashover coaches from Andel kits - pending). I picked these up on eBay a couple of years ago when I wasn't sure what coaches I wanted to have for the railway. Once the kits have been completed I will try them out on the line to see if I can use them as reserve coaching stock.


Goods stock
Four more open wagons have been constructed using chassis from Hartland and bodies cast in resin from my own moulds (see How I made my third batch of open wagons from resin).

These will join the existing collection of open wagons. Ultimately I want to have at least 20 open wagons as these will form the mainstay of the goods rolling stock, as per my two inspirational prototypes - the Welshpool & Llanfair and the Southwold Railways.

Pruning and over-wintering
Outdoors, the shrubs and more energetic plants have been pruned back


and the vulnerable concrete overbridges have been covered to protect them from frost.


The Workshop
I've spent a bit of time (and money) on improving facilities in the workshop. This is situated on one side of the conservatory (with thanks to my other half). I've lengthened and widened the shelves - on which I store ongoing projects and stock requiring remedial attention - the casualty bay!


In addition, I've extended the workbench. This was originally a pine dressing table discarded by my daughter. A large piece of pine shelving (discarded by my other half) was almost tailor-made to fit the available space.

To do
Next on the list are:
One thing you can say about garden railway modelling - there is never nothing to do!

    How I lined my locos using Trimline tape

    Introduction
    In this posting I aim to share with you the approach I have developed for applying Trimline lining tape to locos.
    This comes in 5 metre reels with a range of widths on each reel. At a cost of around 3 UKP a reel it represents good value for money. One reel is sufficient for one small G scale loco, though I've found it's handy to have another reel to spare. The loco shown in this posting is the line's No. 3, a Hunslet constructed from a Garden Railway Specialist's kit and an LGB Toytrain 0-4-0 chassis (see How I constructed a Hunslet loco from a GRS kit).

    Painting 
    From some of my other blog postings you'll see that painting locos and stock is my least favourite activity. I struggle to get that perfect finish which I'd like to achieve. I am improving my techniques for spray painting but I've still not entirely cracked it. I use aerosol spray cans. I don't feel I would sufficient use from a compressor and spray gun to justify its cost - I assume I'd have to buy an expensive one to get a decent finish. Anyway, what I have learned about aerosol spray painting so far is:
    • Only spray when the weather is dry and the room is warm
    • Heat up the cans in a bucket of warm water before using them
    • Use high quality masking tape designed for models
    • Try to spray evenly in long easy passes rather than in short bursts
    • Handle the sprayed models with disposal latex or vinyl gloves to avoid greasy finger marks
    • Remove the masking tape as soon as the paint is touch dry
    • Wait a couple of days for the paint to harden off before applying the tape
     Lining
    Once the paint had hardened off, I then decided where to start the lining. I now tend to do it by eye, but with the first loco, I measured 4mm in from the edges and put a pin mark at each end to try and keep the spacing regular. I usually start with the longest, straightest lines as these tend to be the easiest to apply. On this Hunslet model the longest run was along the base of the saddle tank.


    I cut off a piece of the lining tape, allowing a couple of centimetres at each end. Although this is wasteful of tape, I find it useful to have this excess for handling the tape.


    The tape was then lifted off the backing sheet with the point of a craft knife or scalpel.


    The ends of the tape were then held between finger and thumb of both hands and positioned, stretching it slightly to keep the tape taut and straight.

    The tape was then manoeuvred on to the model and once applied, smoothed down with the tip of one finger. If (well, when) the tape ended up in the wrong place or slightly curved, it was lifted and reapplied.


    When two adjacent tapes crossed over each other,


    the scalpel blade was carefully positioned lightly over each tape


    and the excess piece of tape pulled up against it. In this way the tape was trimmed off precisely without cutting into the underlying paint.

    The remainder of the straight lining was completed before tackling the curved lining. This took a little longer. Rather than laying down the whole length of tape, one end was pressed down with a finger-tip and the tape curved round and pressed down in short steps. This often took two or three attempts before the right curve was made.

    As with the straight lining, the excess was trimmed off at the most appropriate angle against the adjoining piece.

    On one loco (the Barclay) I used wider tape and found the tape buckled on some of the tighter curves. The rucks were nicked with the point of the knife and pressed down with the rounded end of knife handle. This was not entirely satisfactory so, in future, I will stick with the narrowest tape.


    Once all the lining had been applied and firmly pressed down using the back of a finger nail or the rounded end of the scalpel handle, I touched up the spectacle plates, sandboxes and chimney with 'brass' enamel paint.


    Nameplates
    I then applied the nameplates and number plates. From experience I have discovered that the most reliable way of gluing nameplates on is to position them,

    then move them to one side, apply a one or two small drops of superglue to the place where the plate will be fixed,


    then place the plate on the glue.


    This helps ensure the glue stays out of sight behind the plate.


    Here's what happened when I did not use this approach:


    The glue seeped out from behind the plate and all attempts to remove it made the problem worse - another lesson learned from experience!

    Varnishing
    The loco was then masked, in preparation for the application of varnish.


    Waterslide transfers were applied to the buffer beams.


    As with the paint, I used an aerosol of varnish which was warmed up first in a bucket of water.


    Two light coats of acrylic varnish were applied, and left to dry, before the masking tape was removed and the loco left for a couple of days for the varnish to harden off.

    WARNING! Always test the compatibility of the varnish with the underlying paint before applying. Here's what happened when I didn't. The paint was Humbrol enamel and the varnish was acrylic car spray:


    The handrails were then fixed in place (with Superglue), spectacle plates were glazed and a driver positioned in the cab.


    Loco number three was now ready to join the line's expanding roster (apart from re-fitting the couplings!).